Thursday, July 14, 2011

Summer Flowers......Gift Bag

Today is my day,  to post for the Magnolia Stamp Lovers Summer Flower Challenge!  I have decided to make a gift bag with flowers!  I have decided to go through my supplies and start using up some of the things that I have and create new and different things.  I came across a sheet of vellum and decided to make it into a gift bag.  I cut the piece out and then embellished it with rub ons, making them stand out by using a stylus from the McGill Tool Kit and the McGill Molding Mat.   I used a flower to top it off!


One of my favorite images is Tilda with Hawaiian Flower from the Butterfly Dreams Collection.  I colored her with copic makers and used some stickles to add some bling.  The butterfly I used on the tag (a Doohickey Cutting Die) was from a previous collection from Magnolia.  
I decorated the back of the bag as well.  So all that is left to do is tuck a little gift inside and some tissue paper.  So, what would you place inside this gift bag?  

Monday, July 11, 2011

A Slice of Summer

Here is my contribution to the Paper This and That Slice of Summer Challenge.  I have made an envelope gift bag that I have decorated with leaves stamped in lemon whip, filled with Crystal Lite Lemonade, and then decorated with House Mouse Stamped Images (colored with copics and stickles) and then attaching straws.  


I love this House Mouse - When Life Hands you Lemons!  Hope you enjoy my gift bag!

Sunday, July 10, 2011

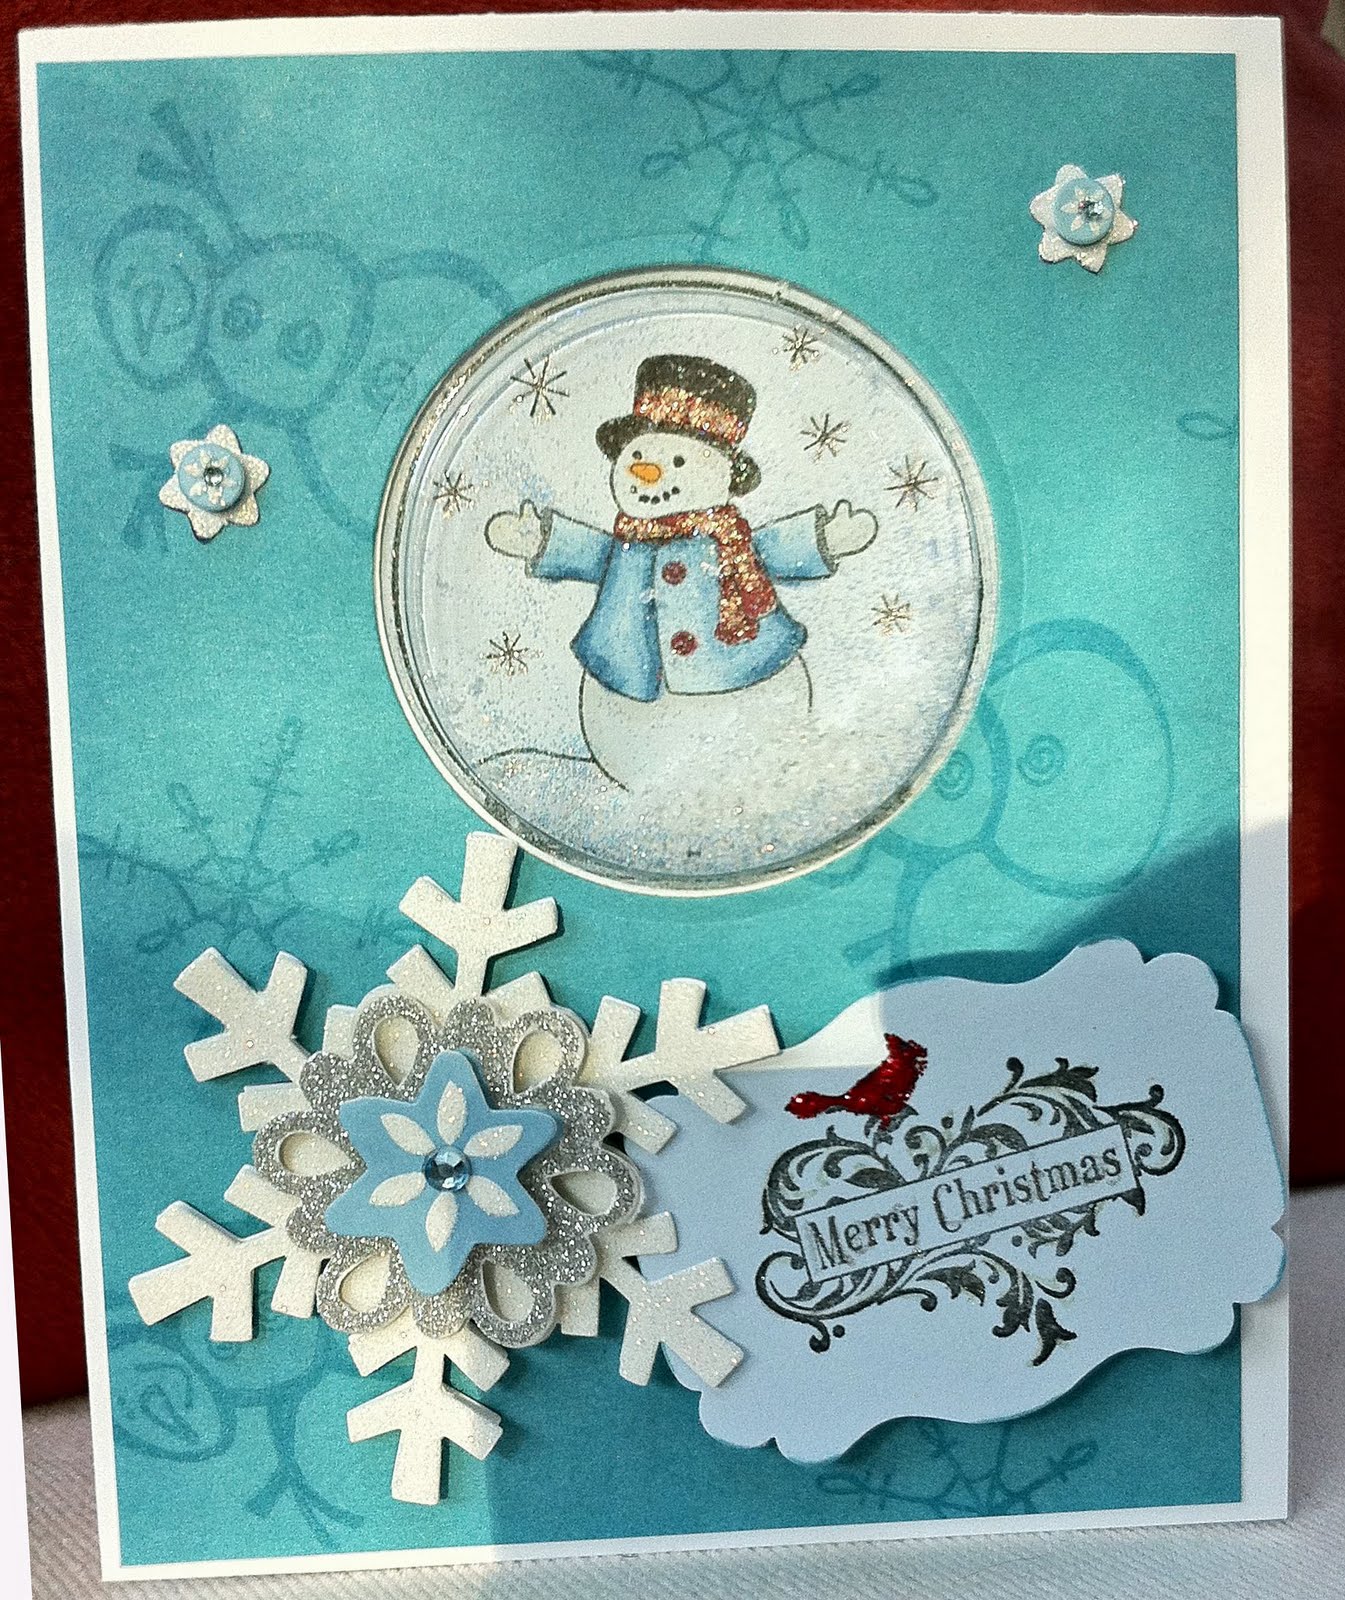
Snowman Shaker Card

I have to admit, I am thinking more and more about Christmas these days.  I think it is because I need to get started on making gifts and cards, or maybe because it is so dang hot in NC that I am dreaming of cooler weather.  Whatever it is, I really do need to get started on making cards and gifts!

Below is a card that I made with flower soft and a shaker box.  I love this little stamp, but I love snowmen almost as much as I love ladybugs!  For those that know me, that is a lot!  LOL!


Hope you are getting inspired to begin planning for Christmas!  We have less than 6 months, can you believe it?

Monday, July 4, 2011

Happy 4th of July

I have two cards that I have made that I am going to post for 4th of July.  If you have read my post on conserving paper, then you will notice that I have done the same thing when I created these two cards, just in a different way!

The first card I made a few weeks ago when some of my friends were talking about encaustic art.  I went to the store and bought a small craft iron, one that does not have the steam holes on it, rubbed old crayons on it, and then spread it on glossy paper.  This became the background for the card below.  I also used a Spellbinders nestability to cut out patriotric DSP.  The tree that that you see on the card was cut in half and used to make the card look like Tilda was in the woods.  I think this started because I had just watched the movie "Little Red Riding Hood" and it was on my mind.  I cut the tree out with my Silhouette.  I made Tilda's balloon look a little more patriotic by adding an embellishment that was 3D.


The next card uses the negative of the tree image to provide the background for the card.  I then used a stamp that I adore of a little girl watching a butterfly on her shoe.  I put the fireworks up in the right hand corner of the card and put an embellishment on the card that says "look up".  I guess she is too busy watching the butterfly to see the fireworks above.  I hope you like these cards I have posted today, and hope that everyone has a very Happy 4th of July!!!!

Ladybugs are Patriotic

My contribution of the red, white and blue challenge at Stamping Scrapping is Kneeling Tilda with a ladybug theme. I used copic markers to color her, Spellbinders to cut her out, and Tim Holtz Distress Ink in Barn Door to color around the edges.  I used ribbon, brads, and flowers to embellish the card.


Friday, July 1, 2011

Conserving Paper Tutorial

Today is my day to post a tutorial on the Stamping Scrapping Design Team Blog. I have posted this tutorial on how to Conserve Paper when making a card.

 If you have ever thought that you didn't want to use up a sheet of DSP to make a card because it is the last one you have of that design, or you spent a lot of money on it and you hate to use the whole thing in one layer on a card, I am going to show you a trick/tip to make that beautiful piece of DSP, or any piece of cardstock, go a bit further.

I have some gorgeous Magnolia DSP that I have been saving and have finally decided to use it.  First I am starting with some of the Cryogen White paper as the base of my card.  I love this paper because it has a shimmer to it.


For my first layer on this card, I am going to use the Core'dinations Gemstones paper.  I am all about the shimmer, so had to add some more.  


Since I am going to add another layer on this paper, I am going to use my Big Shot to cut out the center with the Spellbinders Scalloped Circle Nestabilities..  You won't be able to see that I have cut out the center when I add the next layer,   I will use this piece on another part of the card.  


I take the DSP that I will be using as the next layer, and cut it out with the Spellbinders Beaded Circle Nestabilities.


This piece will go over the scalloped circle cut out and you won't even be able to tell that I did not use a full sheet of paper underneath it.  However, since I will be placing an image on top of this cut out DSP, I will cut the center out of this piece of paper as well.  You will never be able to see that I did not use a full beaded circle cut out when I am done.  


Here I have placed the image on top of the beaded circle die cut.  So, can you see that I have not used a full sheet of paper?


The piece of DSP that I cut the center out of the beaded circle is used as a part of the inside of the card, along with the scalloped circle cut out that I cut previously out of the gemstone paper.  With this part of the card, I didn't mind it you could tell that I cut out the center of the DSP since I am using it as a layered frame. 


This is how I conserve paper and piece together a card with all of the items that I have cut out. So, you might now be asking yourself why I have not shown the complete card so that you can see all of the items that I used on it?  Well, this card is my post for the buttons challenge at Magnolia Stamp Lovers, so you will have to hop over there to see the card  in its entirety.  I am such a tease!!

Buttons.............and Ladybugs!

Today is my day to post a card for the Button Challenge over at Magnolia Stamp Lovers.  Anyone who knows me knows that I am a ladybug fanatic!  So, when I was looking through my buttons to see what I wanted to use to make my card, I found these adorable ladybug buttons.  My card then became centered around these two ladybug buttons, so here is the result!


I used the Magnolia stamp Kneeling Tilda from the Sweet Rainbow '11 collection.  I have to buy each and every stamp that I see that has a ladybug in it.  On the inside left of the card, I used a Magnolia ladybug stamp as well.  


Here is a picture of the inside right of the card.  


If you are interested in learning how I conserved paper when making this card, you can see my tutorial on that over at the Stamping Scrapping Design Team blog.

Here is a list of supplies that I used on this card:

Here is a closeup of Kneeling Tilda so you can see the image and the glossy accents used on the ladybug.  


I hope I have inspired you to make a card of your own for the challenge!  We would love to see you here!